Restoring Wood Bases
Many landline telegraph instruments, such as Sounders, Relays, KOBs, and Registers, are mounted on wood bases. Many of these are made with hard Cherry Wood, properly stained, and almost all are finished with Shellac.
Most of the time when you find an old telegraph instrument, the wood base needs nothing more than a cleaning with furniture polish such as Pledge. This will remove both the accumulated surface dirt and also restore a nice shine to the shellac. If there are any dings or scratches in the base, don't worry about it. They give character to the instrument. Remember, you want the restored instrument to still look its age, not like it just came off the production line.
In some cases, you might find that the wood base of an instrument has areas in which the shellac has worn away, leaving a dull patch which stands out against the shiny Shellac finish. You can improve the shine in this dull area by wiping it with Tung Oil. Or you might prefer to leave it with the dull finish to give it more "age".
In the worst case, sometimes an instrument that has been kept in a bad environment such as an old barn for a hundred years, will be pretty much devoid of the original Shellac finish, and possibly the wood itself is starting to rot. If this is the case, you might want to consider totally refinishing the wood base or replacing the base altogether. In either case, you will need to learn how to apply Shellac properly. Please don't use Polyurethane. Yes, it's very easy to apply, but it looks awful compared to a genuine Shellac finish. Remember, no cutting corners when restoring telegraph instruments !!
The question of whether to refinish or replace the base will likely be decided by whether or not the wood itself is still intact. Sometimes these old "barn finds" have wood bases that are pretty much rotten, in which case they need to be replaced. Ebay is a very good source for wooden bases designed for telegraph instruments, especially Sounders and Relays. Bases big enough for Registers or KOBs are difficult to find but many of these Ebay sellers are woodworkers themselves and can make a custom base for you upon request.
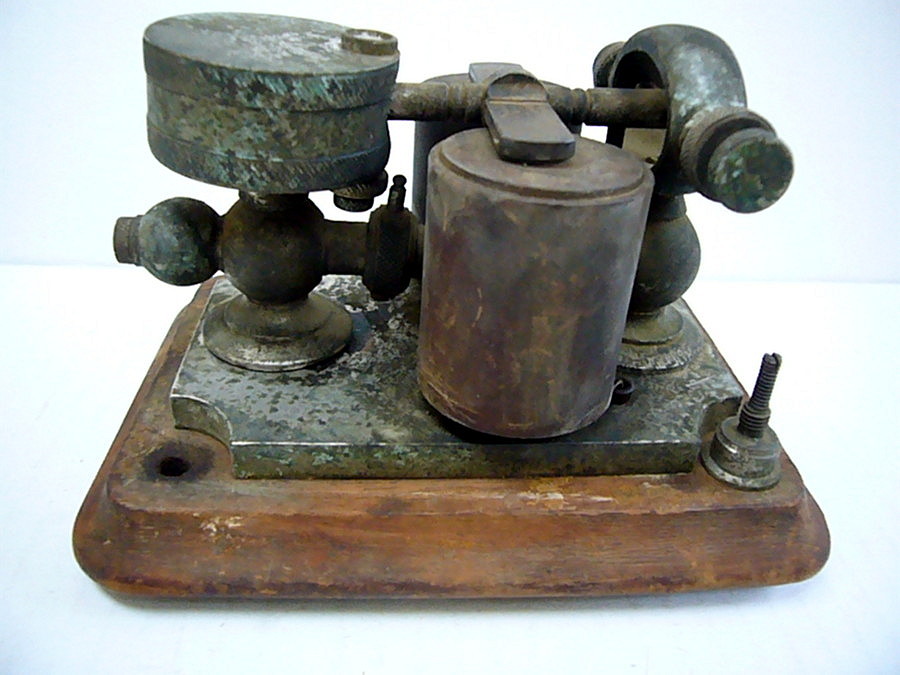
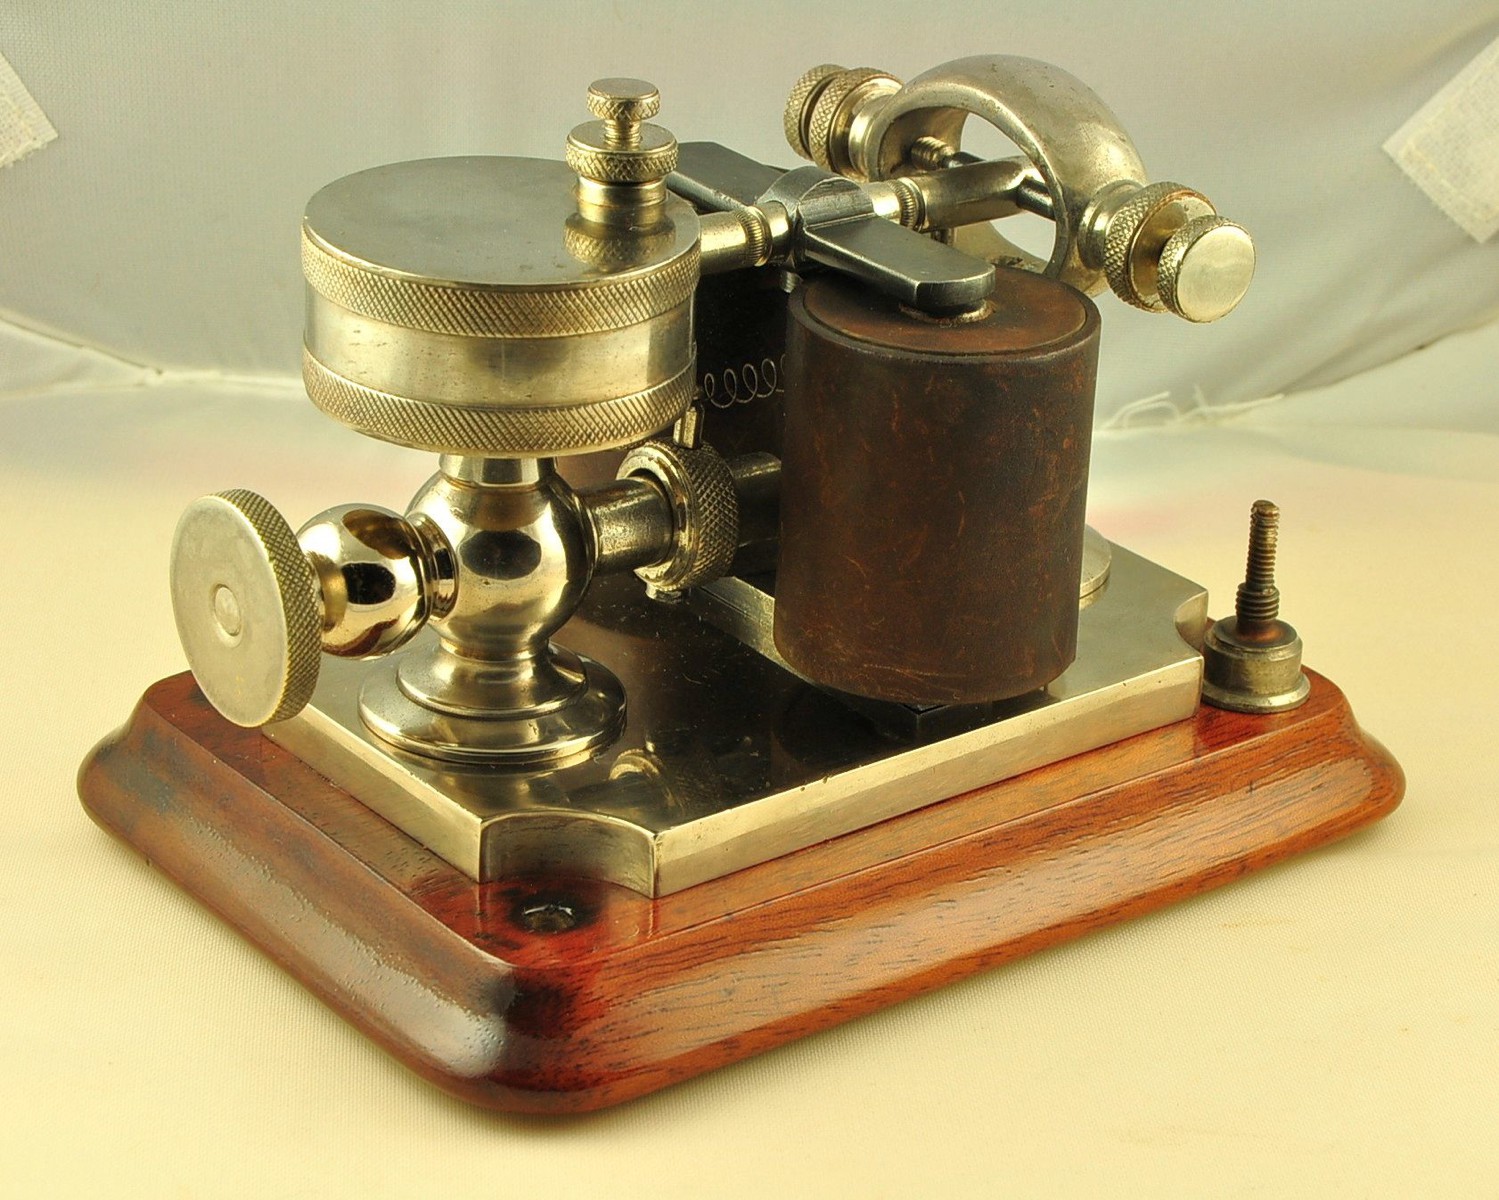
Below is an example of an early sounder in which the finish on the wood base has deteriorated. The Shellac is completely gone and the wood itself is discolored and dried out. This is a prime candidate for re-finishing with shellac. Also pictured is the same sounder after re-plating the metal and re-finishing the wood base:
 |
 |
|---|
For your re-finishing project, you will need the following supplies:
- 1 small can of Minwax Cherry Color Wood Stain
- 1 small can of Zinsser Bullseye Clear Shellac, available from most hardware stores.
- Denatured Alcohol
- A white cotton undershirt (for applying the Stain and Shellac)
- A box of disposable latex surgical gloves
- Emery Cloth: 220 and 320 Grit
Shellac is a resin excreted by an insect from SE Asia. Professional woodworkers buy this resin in the form of dry flakes. The flakes are dissolved in denatured alcohol to create liquid Shellac prior to application. However, you can buy clear pre-mixed Shellac from the hardware store. Be aware though that liquid Shellac has a limited shelf life (maybe around 1 year) so don't bother buying a huge can of the stuff if you only intend on using it for a few projects. 1 Pint or 1 Quart should be plenty. Dry Shellac flakes last a long time, which is why the pros use it.
Re-finishing wood bases will be broken down into 2 parts: Staining and Shellacking.
Staining:
Disassemble the instrument and put the wood base aside. Wipe off any excess dirt and dust. Sand the base to a smooth finish, first using 220 Grit Emery Cloth, then 320 Grit Emery Cloth. This will also remove much of the discoloration if the wood is dried out.
Next, find a screw hole near one of the corners or sides of the wood base and screw in a wood screw part way into the hole. This will be used as a handle to hold onto the base during the staining and shellacking process so you don't have to touch the wood. Pick a screw approximately 1.5" long and the size just slightly larger than the diameter of the hole, so that the screw will tap into the wood enough to stay in place.
Now take your white cotton undershirt and cut some pieces into 3" squares. Fold in half and half again so that you have 1.5" squares. Stir the cherry colored wood stain well, put on your surgical gloves ( I actually use a glove only on my right hand. The other hand will hold the "screw handle" from underneath). Dip one of the cotton squares into the wood stain then rub onto the wood base. Only stain the top and sides. The underside of bases is generally not treated. Set the base down onto a small stand and allow to dry for a few hours before applying a second coat. You are now ready to apply the Shellac.
Applying Shellac:
Many people who have attempted to work with Shellac are disappointed because they wind up with a streaky finish that is not smooth. That is usually the result of not diluting the Shellac, and trying to use a brush to apply it.
Full strengh liquid Shellac dries very quickly; hence, if the mixture is too concentrated or you apply it with a brush, it will dry before it has a chance to spread out, which results in a streaky finish. Using the cotton undershirt pads to apply the Shellac will help immensely, but you still need to dilute the Shellac.
The concentration of liquid Shellac is specified in Pound Cut, which is the number of pounds of dried Shellac chips dissolved in a gallon of alcohol. Most of the small cans of Zinsser Bullseye Shellac is 3 Pound Cut, which has 3 pounds of Shellac Chips per gallon of alcohol. When re-finishing wood telegraph instrument bases, I like to use 1 Pound Cut of Shellac. This makes it much easier to apply with no streaking.
To make a 1 Pound Cut of Shellac from the 3 Pound Bullseye Shellac, simply add 3 parts Denatured Alcohol to 2 parts of the Bullseye Shellac. (If you are starting with 2 Pound Cut Shellac, add 1 part alcohol to 1 part of Shellac). After mixing, I like to keep it in a small plastic squirt bottle so I can easily control how much I put on my application pad.
(If you get confused by my instructions below, there are many videos on YouTube that illustrate the process of applying Shellac)
To start the process, put on your latex glove. Take one of your cotton pads and squirt the Shellac solution into the pad until it is soaked with the Shellac but not dripping from the pad. Pick up the wood base by the "screw handle" with your free hand and begin to apply the Shellac.
When applying the Shellac, imagine an airplane landing on a runway, then taking off again. Start your stroke about 1/2" onto the top of the base, wipe the pad all the way past the end and lift off the base, then turn around and make one more pass on the same line, starting maybe 1/2" onto the base and continuing past the end....and lift off. Do not try to make more than one pass in each direction, because the Shellac is already beginning to dry so you will get streaks.
Immediately start your next pass on the top of the base, slightly overlapping the previous pass (like cutting the lawn). Make one pass up and back, then move onto the next area. Continue this until you have completely coated the top surface of the base.
When the top surface of the base is completely coated, repeat the same procedure on the 4 sides of the base.....one pass out and back on each side. The wood base should now have one complete coat.
After the 1st coat is complete, place the base on a small stand and allow to dry for 1 hour. Then repeat the above procedure exactly the same way for the 2nd coat.
To achieve a nice smooth shiny finish you need to apply multiple coats of the 1 Pound Cut Shellac. I would suggest 5 or 6 coats to achieve the desired results.
For each coat that is applied, the drying time between coats increases. After the 2nd coat, I would suggest waiting 2 hours before applying the 3rd coat and another 2 hours before applying the 4th coat. For the final coats, you can wait wait several hours or even overnight to apply the final coats.
After finishing the final coat, and you have a finish that looks good, put the base aside and let it set for a few days (or longer in humid environments) to make sure it is completely dry and the Shellac is nice and hard. Touch it lightly in an area on the side to make sure it has no tacky feel to it.
When the base is completely dry you can re-assemble rest of the instrument onto the base.
![]()
![]()